11.27.2010

Nacho Tartlete -Anti Chef

-funny story. my good friend John used to run a New Mexican to-go joint in Corolla, NC called Donkey Hotay's.

It rocked.

I used to help him out a little when my "tour guide" schedule allowed me to, and he gave me food at half price. I would have paid full price though, 'cuz it was 'effin' good! Damn you Juanito!!! Damn you twice for leaving the beach hell we shared! Ahhh...ay Papi...Anyway, as he was pulling up stakes to move to the D.C. area and try his luck at a more "Urban Donkey", we banged our heads together briefly to try and brainstorm "signature items" that would be both neat and quick treats to make and consume, but also inexpensive to create and items that would be in keeping with the "funky" sort of dressed down atmosphere that he had worked to create. Anyway, one night it hit me....and I laughed,thinking of the two words together, nacho tartlete. I think it could fit in here under a trilogy of recipes entitled : "what to do with the rest of the tortilla chips in the bag when they're already all broken up anyway". But, we'll keep it short, cliffhanger for now, just the nacho tartlete one. So, if you have a mini muffin pan, or you can "get" one somehow, then follow along.

The inspiration of this recipe comes from trying to eat cheese dip with a little pinched crumble of broken chip left overs, and getting cheese on my digits. I was feeling all cave man and so I took the next logical evolutionary step by thinking of a way to jam their two separate goodness-es together, like a little "New Mexican Takeout Leftover Reese's Cup" kind of thing. The first step would be to get the cheese combined with the tortilla chips which involved crushing them into a fine meal, easy. Part two was the "what do I cook it in ?" moment, and non stick muffin pan jumped in, the thought of melting cheese against a surface that it won't adhere to was just too enticing to turn away from. I started thinking of other things that would go great in there, or on top. Chili, taco meat,re fried beans, micro brunoise of lettuce, tomato, olives, fresh hot peppers, sour cream...creme fraiche...what ever...I was high, and it was time to make this! Excuse me..."high"... on life, um...kids. So you should be almost ready to do this without me by now, as it is truly brainless, except for the gathering of the ingredients you wish to use, and the making sure you don't burn the house down when a craving for a little 'snaq' like this one strikes...

ingredients (only suggestions) :

- a non stick mini muffin pan
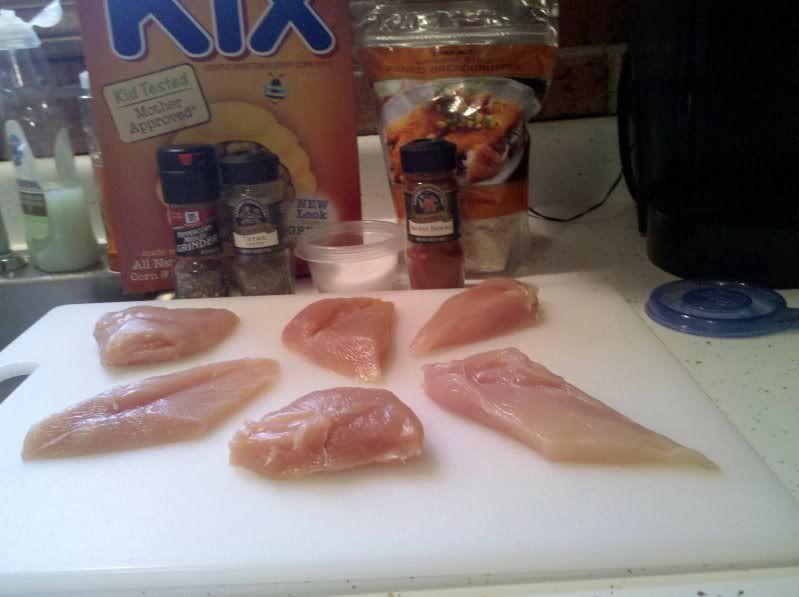
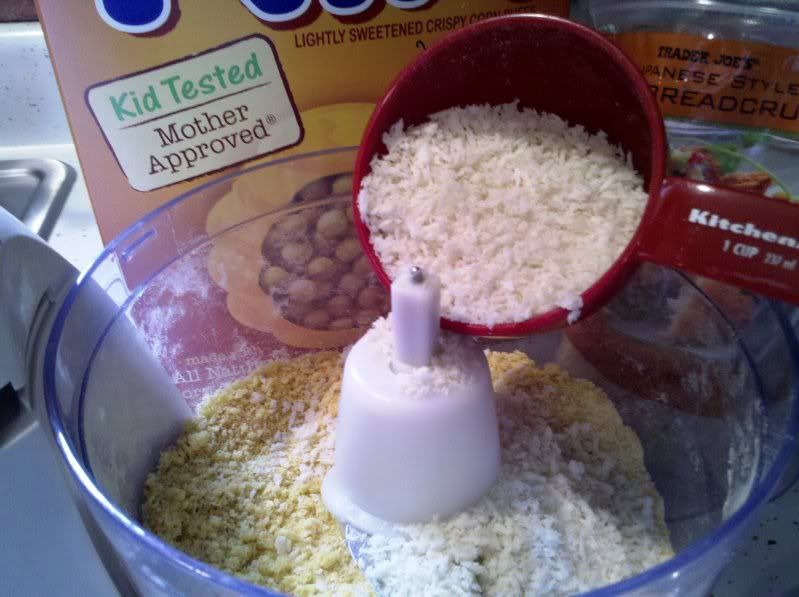
- about a cup or two of finely crushed tortilla chips ( you can smash 'em pretty good with your hands right in the bag)
- about a cup or two of any cheese(shredded) or cheese dip you may have laying around that fit the flavor of the fever
- about a cup or so of ingredient 3* (chili, taco meat, re fried beans)
- a bunch of garnish stuff, or not

method:

- preheat oven to 400 degrees
- mix about half of the cheese and half of the tortilla crumbs together to form a loose sort of mixture (if you use cheese dip, don't go too wet)
- fill the muffin holes about a third of the way with the tortilla and cheese mixture
- add a dollop of ingredient 3
- top with a sprinkling of the tortilla and cheese mixture to sort of cover and fill the muffin hole
- bake for about 12 to 15 minutes, or until bubbly and browned
- allow the tartletes to cool to near room temp and then carefully remove them
-garnish them as fancy pants as you would like or don't, they will be great as is, trust me

* cooks notes:

- ingredient 3 just means whatever you have, I often use this at home as a different way to enjoy a chili I made, or leftovers from the local Mexican Restaurant, whatever
- you can really dress this up if you want to, use a little leftover chicken breast instead of chili or beans and top with a dice of sweet onion and cilantro, or a nice cool salsa verde,
or dice up some little tomatoes and peppers and paint some sour cream on from a squirt bottle to decorate, turn this bite into a little amuse bouche for your next party, or just eat them in your underwear, standing in the kitchen next to the oven, and the mess you just made at 4 a.m., like the first time I ever tried to make them. DO IT!

11.24.2010

Mystery Solved -killertomato


Every now and then I find a scrap of paper with some ingredients scribbled on it with no title or directions holding a place inside a novel or poking out from behind the washing machine. This particular doodle was found inside a shoebox full of similar fragments (organized chaos just works for me). I was noticing that we had rice, chicken, and carrots with which to fabricate our victuals and as I scrutinized this magical recipe, it began to shape up into just the thing to take chicken and rice from boring to fun. It looked like a recipe for sweet and sour sauce!

Here it is:
2-3 garlic cloves, minced
2 tsp minced fresh ginger
1/4 tsp crushed red pepper flakes
1/4 c. brown sugar
1/4 c. distilled white vinegar
2 Tbsp tamari
1/2 tsp fish sauce
4 scallions

B had done his usual great job of finding natural chicken from a reputable, local company, which I had deboned yesterday and made cutlets with the breast. Those were sauteed and set aside while the rice got going. I only have brown rice right now, which is so much healthier and subsequently causes people to make faces at its mention. So that was going, and it takes a lot longer to absorb the water so I had put it on first along with the 5 sliced carrots boiling in water. After the chicken was sauteed, I left most of the fat in the pan and added the garlic and red pepper to cook briefly over medium heat. (I did not have any ginger and I think it would have added a pleasant zing to this sauce but they certainly don't stock that next to the faded Banner sausage cans down at the corner grocery.)

Next, I added the brown sugar, vinegar, fish sauce and some mushroom soy sauce we have, instead of tamari.

 (*You may have an even better substitute than what is called for...a big part of my approach is to get you to use what you already have rather than run to the store for ingredients or decide you can't make something.)

The sugar made me want to treat it like caramel so I amped up the temp to high and moved the pan around while it boiled and thickened. This is when I realized your rice and chicken should be plated so you can sauce it immediately. I still had to mash the carrots, so that wasn't going to happen and so I didn't let it thicken that much. I think that's better, because there was some left over that was saveable. I only had two scallions to slice and scatter over the top, and that was fine too.
The carrots were mashed and peppered well and given about a tablespoon of hot cream, which was really just whole milk we get from a local dairy that's super creamy. The baby would be sharing so I set that aside for her and put a little butter and salt on the grownup's carrots. What was left was put into a container for her to chow down on the next couple of nights.

Maybe in the future I'd do carrot croquettes with this, ever had those? They are formed and deep fried like salmon croquettes, really fun.

11.22.2010

Rose Hip Tea -Cutiepie Spacepop

We are lucky enough to have rose hips growing right outside of our house...wrapped around the mailbox...and ready for picking.  Why do a post about basically boiled water on a food blog?  Well, several reasons really...and the main one is that they were there...just sitting there...not doing anything much...until The Butcher called them out and as is his fashion...plucked them to their deaths...


Here is a little background on rose hips....first and most importantly, they are LOADED with Vitamin C...packed...super packed!  That is a good thing as the weather gets colder and we all start to sniffle and some of us even lose our voice...like me...The rose hip is formed after the rose has lost its petals and the seed pod grows.  When things got tough in the second world war...the Brits were said to have supplemented rose hips for their lack of citrus.  The plant we harvested from is a wild variety of some sort...not the prettiest flowers but its made up for that with the rose hips.  Since it is largely neglected it has some of the best rose hips around...no pesticides, no tinkering with in any way.

You can use the rose hips right away or you could dry them...its up to you really...just be sure to remove the seeds as there is some lore about their irritant properties.  It is so simple to make a cup of rose hips...crush the fresh ones and boil them...let them steep for as long as you can.  You can sweeten the drink, or not...its up to you.  I like strong, strong, strong tea...and while this is technically an infusion, we will stick to tea as it takes less time to type...  I have yet to make a cup from dried rose hips...but I have so much that I am sure the end of the stash will be dry enough in no time.  I've read its a good idea to de-seed when the pod is half dried...it is much easier to extract that way.  I will have to update you later with what I find.

I have had some excellent feed back from a lot of you!  My friends abroad, namely A Brilliant Life, have really made some great comments about the tone of ease when it comes to making the dishes.  She does not have available to her the items we have available to us here in the states...so she has expressed inspiration when reading about the "whatever you have on hand" method.  With this in mind I decided to throw in this incredibly simple, yet, for me, inspiring post.  To look around you...a little differently...you will begin to see that you don't necessarily have to be a farmer to reap bounty from the land...in this case...from the mailbox.

11.17.2010

Marinade...in this case for meat... -Cutiepie Spacepop

Now that it is entirely too cold to grill...I follow suit in my usual timely manner...

Be warned my fruitarian friends, advert your eyes!

I live with an ex-butcher...really.

And while this has rarely come in handy since I was a vegetarian until I got pregnant...it has, post baby, come in handy a few times.

I'm not one to eat a lot of meat. Its just not me...not for any reason other than I don't really care for it. However...there are times...and in those times this is when The Butcher's expertise comes in handy. I haven't a clue on what constitutes a good cut...or what the clues are to skip that one and move to the next. So he does that rare purchase.

For those of you who like a good steak, two words: Chuck Eyes.

This used to be our little secret many years ago, but as The Butcher noted recently, this cut seems to have been catching on. Probably because it is so affordable when compared to similar cuts...and in my opinion (and we know I have limited knowledge on the subject...) it is just as good.


What makes it better? Fresh marinade.

There is something in fresh oranges and pineapples that make a meat turn to mush. Be careful, it really can do this! If you follow the below, an hour should do you. You don't need to do a thing other than flip the steaks half way through the marination time.

What is a serving really...its marinade...so I don't think there is too much to worry about in terms of nutritional content...this is a freebie, taste only sorta thing.

Fruit Marinade

2 Oranges - juiced (I threw the whole thing in...peel and all)
About a quarter of a fresh Pineapple, cut the death spikes off
1/2 a head of Garlic, don't be shy
Soy Sauce - I use low sodium and if not that then some Bragg's does the trick
Ginger Oil - this is one of those nice surprises...

Now, no juicer, no problem...have a blender?  Or a food processor?  No?....Well, you need to go borrow one...go on...I'll wait....

Ok, now whatever food obliterater you have managed to get your paws on, go to town.  If you are lucky and you have a juicer, then you can skip the straining necessary for the blender or the food processor.

Throw all of it together and let it rest.

As noted, this has like super funky enzymes, or some shiz, in it that really break down the meat...if you leave it on too long you might be eating meat pudding...and outside of a Ren and Stimpy cartoon, this is just wrong.

Don't throw away the pulp you have!!  Wait for a following post to get an idea what to do with it...in the meantime, put your trimmings, garlic skins and all, in the freezer.

Dig in!

Apple Cake -killertomato

This is a very easy recipe for apple cake that's also pretty economical. Even the caramel icing doesn't use much of the butter, cream and sugar it calls for. If you have never baked a cake, this one is great to start with. I'll walk you through the caramel but the cake could be finished without any icing in my opinion.
+
This cake is like most and gets better and better with the quality of the ingredients. If you are making this in the fall, you can find interesting varieties of apples around you. Apples have the potential to produce infinte varieties, so why not give them a chance at survival? Red Delicious and Granny Smith are all fine and good but they're like that annoying little bastard who always got picked first for the team while you inwardly cursed at the bores who just went safe instead of with you. I went on the hunt to see what I could find. The first trip was to the weekly farmer's market that is held near by, but it was too early perhaps, and I'm not even sure that any of the usual farmers there are growing apples (we did find some small pears). So being lucky enough to live close to the State Farmer's Market in Forest Park, GA (which is near Hartsfield Airport) I drove there the day before baking and found several farmers from the North Georgia Mountains showing off their apples. There were many different kinds including the usual suspects, and I wound up choosing Mutsus for their softness. They were selling by the bag and the smallest was $5, so with the rest I'll be making and freezing apple sauce for the baby, as she loves it in her morning oatmeal.
+
Here's the recipe:
3 c. flour
4 eggs
2 1/2 c. sugar
3 tsp. baking powder
1/2 tsp. salt
3 apples, peeled and sliced
1 c. vegetable oil
1/2 c. orange juice
2 1/2 tsp vanilla
5 Tbs. sugar to dress apples
2 tsp. cinnamon* to dress apples
+
Grease and flour tube pan. Why a tube pan? Because it will be much easier to get your heavy cake out of the pan without disaster striking if you can remove the bottom. Peel and slice apples and sprinkle with sugar and cinnamon. Set aside.
 

I agree with (Peter) here that whole cinnamon is the best thing to use if you've got it. It's cheaper by the bag and you just put it into a coffee grinder to pulvarize it into a super pungent powder that will leave a lasting impression on the tongue later.

Sift flour, salt and baking powder together. *See bottom of page to get a recipe for homemade baking powder. Sift it 3 or 4 times for a lighter texture. I swear by this, even for pancakes. Mix eggs, sugar, vanilla, orange juice and oil in that order, whisking after each one. Combine with dry mixture and stir well, until all is smooth. Batter will be thick. Pour half into pan and then put apples in, then the rest of the mix. Bake 80 minutes at 350 degrees. As with all cakes, it may take less or more time, depending on your oven, etc. If the cake is beginning to pull away from the pan and a toothpick comes out clean, it's done. In my electric oven, it was about 70 minutes.
+
Caramel glaze:
(This may or may not be the same recipe we used in a restaurant I once worked at. I guess if someone comes across this and is pissed, they can just leave a spiteful comment. I really don't remember as I use several different caramel recipes now.)
1/2 stick of butter
1/4 c. white sugar
1/4 c. brown sugar
salt (pinch or dash depending on your love of salty caramel.)
1/2 c. half and half or heavy cream- half and half works fine and you can use it for more things later.
+
Get a fairly big saute pan, just don't use a tiny one, and put it over medium high heat. Put cold butter in and let it melt a little, don't think you are helping the process along by letting the butter soften a little-you're not. Add everything else, and your cream needs to be cold too. Now just slide the pan back and forth towards you without stopping. Watch it all start melting and swirling together. Tell it that it's beautiful. Keep going. See those bubbles? Good, it's coming to a boil. Keep going. Now it's starting to form a blob, like brown ectoplasm perhaps. It's starting to grow legs as if it may stand up and try to ooze out of the pan and go attack a town. As it starts to pull away from the pan and form a cohesive mass like this, take a spoon that you have nearby and let some of the caramel run off it. Does it go fast or slow? Thick or thin? Just as it starts to go slowly and heavily, take the pan over to the apple cake and begin spooning it over the top. You can see it thickening up qickly so you must do this right away. YUM!
+
Baking powder- Two parts baking soda mixed with one part cream of tartar makes baking powder. Sift them together to make sure it's all even. It keeps for a while but I usually make just enough, to avoid future stress.

Honey Kix and Panko Breaded Chicken -Anti Chef


Any other moms or dads out there just love the feeling of cooking for five or six hours to create a big fancy pants meal only to have your little angel(s) give you the high hat? Okay, how about ...has anyone ever felt like just feeding your kid cereal until they turned into it? No? ...hmm, can anyone tell me the fundamental gastronomic differences between a Dorito and a Coke? No again? What about between kids cereal and chicken/seafood breader...? Ahh, getting warmer now...pretty much no difference at all. You may find a few extra or omitted spices based on which of the two we are talking about, but other than that there is no huge difference in the contents of your kids cereal box and one of those packages of pre-mixed chicken or seafood breader you buy at the grocery store. Most cereals are made almost completely of corn, or corn meal...and most any cook who has worked in a tourist trap of a beach town like mine will more than likely confess to having prepared at least one fried offering that has been breaded in some sort of pulverized breakfast staple. Or have none of you ever heard of Cap'n Crunch Shrimp, or Fried Ice Cream...yep, that's just corn flakes on there folks, smashed up corn flakes. (they were probably going bad to start with, after some kid-less hack surfer/restaurant manager that didn't know shite brought them in in case any kids wanted them) The truth is, LOTS of cooks crush up LOTS of stuff to "crust" something with, and that idea strikes people for the strangest of reasons...that strange urge to coat something perfectly nice in something which would seem at first completely wrong. Stupid, stupid, busy humans.

In this case found myself with WAY TOO MUCH Kix cereal in the pantry...kid tested, mother approved... and WIC friendly. If I could have given it out by the flung handful for Halloween I would have, but we live on a busy road where no one tricks or treats...and to throw it around blindly is just wasteful, so....Honey Kix and Panko Breaded Chicken. Lately, my kid won't go anywhere near chicken unless it is in some mechanically separated, reassembled and fried form. I figured if I could find a way to get her to eat some nice, organic, hormone and hate free chicken breast without having to go to the trouble of setting up (and breaking down) my counter top fryer then it would be well worth the experiment. Before I give you the skinny on the breader, I want to stress...this is ONLY good as a kids thing. I tried to do it all fancy as a dinner for me and the wife (as the pictures will show) but it was just a peculiar sort of sweet. Maybe with a nice honey barbecue sauce or something that would either go well with, or contrast with the sweetness of the cereal...but as a kids finger food, good for dipping in honey, or honey mustard, or whatever....this is cool, and better for them than fried chicken nuggets.

Photobucket

Step One: Wash The Chicken:
Most folks don't realize just how filthy those chickens' tiddies can be after being trapped for hours, or days in that plastic, shrink-wrapped Styrofoam hell they're packaged in. All of those good old bacteria that come along with the meat are laying there, all over the surface just waiting for you, so wash your breasts. Just run them under cold water for a few moments and rub off any schmutz they may have accumulated whilst bound, then just pat the clean breasts dry with some paper toweling. If they are large, I like to cut them into two pieces which will cook quicker and are kid friendly.


Photobucket

Step Two: Breader:
In a food processor, pulse about two cups of cereal until you achieve the texture of lumpy corn meal -- or a little smaller pieces than the panko. Add the panko and continue pulsing to blend, transfer to a large zip lock bag. (gallon size works great)


Photobucket

Cook: Preheat Oven to 400 degrees:
Moisten the chicken pieces with water, then toss them a couple at a time into the Kix and Panko mixture to coat. Place the breaded pieces in a 13x9 inch baking dish, do not grease or spray it. Bake the chicken, after shaking it, in the center of the oven for around 20 to 25 minutes. The chicken should reach an internal temperature of 170 degrees. Discard any unused breader and the bag.
In closing, please remember...handling chicken like a careless jackass will sicken you and/or the ones you love. Always wash your hands thoroughly with warm, soapy water after handling ANY raw meat, and be sure to wash, clean and disinfect all food preparation surfaces the meat may have come in contact with. And don't do anything stupid when handling raw meat...for example, don't photograph your kid's cereal box, which he or she may like to play with, next to raw chicken. I am a trained rule breaker. Do as I say.

11.10.2010

Basic Vegetable Soup -killertomato

This recipe is so basic and simple it seems silly to print it except that we've eaten so much of it lately that I think it's worth noting if not simply for this one reason: After a stretch of eating it for 4 or 5 days straight,we were beginning to curse the monotony until I noticed everyone's skin just glowed.

We radiated.

We didn't even know we'd been missing all the nutrients necessary to have the complexion we wished for until push came to shove and it was time to throw everything in pot and cook it.

Incidentally, I grew up eating this, alternately with a steady diet of beans and cornbread (with chow chow), just about every night. Really, my parents would joke that I must've come from another planet for making faces. But for all the redundancy and pinings for a more glamorous lifestyle, no one ever got sick and we all had fabulous skin- and of course I know now that this diet probably sent my brother and me to college. This is impossibly cheap as well, so enjoy...
  • In a large stock pot, take a tablespoon of butter and a tablespoon of flour and stir constantly over medium to make a roux.
  • After it has become a golden sort of cream and coffee color, put about 4 cups of tomatoes in. They can be canned or fresh, but if fresh, scald briefly and peel first.
  • Stir into roux and add salt or pepper. If using canned tomatoes from the store, you can throw in about 2 Tbsp of sugar to cut that metallic taste.
  • Now put all vegetables that you have available into the pot and add more seasoning and stir again.
  • Fill the pot with water, and any herbs you like. I prefer to keep it more or less simple, 2 T. dried oregano, 1 tsp. thyme, 1 T. paprika, 1 tsp. file, dash cayenne and a bay leaf. (Then I add some fresh basil when I take it off the stove because we have gobs of it growing in the yard.)
  • Bring to a boil and simmer for an hour.

11.05.2010

"roasted stew and biscuitry" -Anti Chef

It's cold here. I spent the better part of Election Day standing outside "stumping" for a couple of really educated people I know who were running for local Board of Education seats. I don't really like politics. I like good food, mind bending dialogue, rain on warm summer days and the under dog. But at times when one finds the self in a 'povertous' stretch one will often make choices contrary to those made in a time of more financial clarity. Isn't that what this blog is about??? Where am I ?

Anyhoo -
when I'm not standing out in the cold to try and be of help to a friend, or answering the forwarded office phones for seventy five dollars a week whilst the boss and Mama play in Jamaica, I like to spend my time writing cerebral horror poems and cooking meals that warm both heart and home. I made a roast over the weekend with the expectation of my in laws. I won't bore you with that recipe...unless you ask me. But you know how a roast has all kinds of good accompaniment with the carrots, onions, celery and parsnips...resulting and including bad ass gravy....mashed potatoes, and nice green side. I chose peas, which I added to a saute of tiny little diced carrots, onion, and some butternut squash I had laying around. Again with the butternut squash and peas and carrots recipe, later...ask nicely this time. (hay zoos) It was a nice supper. So - you know there's leftovers. Ahh....that's where I was, am....the leftover thing.

Get the casserole dish...and don't worry about any habit you may see forming. Trust your old pal the anti chef here, it's me kids...this is going to be great, and it wont hurt a bit.

You need basically enough stuff to fill a 9 x 9 inch or 9 x 13 inch dish, and a can of biscuits. Yeah, you could make some, but most people exist in a world so busy that they never have time to even let the biscuit they get from a drive through cool before they eat it, let alone envision or dare i imagine undertake the "old fashioned" task of actual biscuitry. They, much like I, perpetrate counterfeit biscuitry...obtaining previously manufactured biscuits - either canned, or baked from a mix and served warm, over counters, through windows....bad, bad, biscuit. So, make some of your own if you have the time, the recipe and the balls....go ahead....what, okay Cutiepie....i will also post my Grandma's biscuit recipe they are nice, ask nice...whatever.

Photobucket

So take all of the leftovers, slice the roast into chunks, cut up the onions and carrots and parsnips and celery from the roasting operation, throw 'em in a nice large sauce pan with the leftover bad ass gravy, and green pea and butternut side remnants....heat this up slowly and gently....that's slowly....and ....gently....then pour this "stew" into whichever baking dish it best fits in. You want a thick stew consistency, but if your gravy has gotten too thick it won't work, you may have to thin the mixture out a little with some sort of liquid....water or stock....stock if you have it, but water is cheap. Also if your gravy has gotten too thick...it is probably not bad ass, but somehow, you will live.


Photobucket

Once you have your "stew" in the baking dish place a layer of biscuits on top and bake as directed on the biscuit can...I did it at 350 for about 17 minutes...you just want to make sure the "stew" is well heated before going into the oven with the biscuits and everything should be just fine. Also, with most canned biscuits being really thick, I like to
rip them into thirds by tearing them, "flaky" ones are really easy to separate into three different "layers" and this bakes up nicer than full biscuit size....gives you a better stew to biscuit ratio...very important, or at the very least, a ratio not to be under considered. Just bake the extra biscuits on the same baking pan as the "roast and biscuit" cooks on.

This is one of those flying by the seat of your pants ones, but it is also really, really easy. Once you have gone through the four to five hour process the day before to prepare the roast and everything else this is a breeze. And bear in mind, I got a 2.69lb eye of round roast for about thirteen bucks...add the veggies and all we are looking at maybe twenty and it feeds four grown ups and a two year old for two full meals....well, she will be two in a couple of months, but they fly by. Time flies by...so spend it with the ones you love. Embrace unemployment if you must, and go back to the roots on how to survive the tough times. Buy good quality products to feed your family with, and make the most of everything you buy...and that will excuse you, and me...for canned biscuits once in a while. Our country didn't seem as fat and lazy to me when "the king, the clown, and the colonel" (thanks Tony Bourdain) weren't getting so much of our time and money because the schedules we maintain to actually provide for our families do not allow us time to actually see our families...fast food has gone from a treat, or cheat, to a way of life for many of us, and it is a bad scene.


I guess I should throw up a biscuit recipe, since in my Grandmother's day, having flour, baking powder and shortening "around" was part of having a kitchen, and making biscuits was more common than making a fuss at the counter over whether or not you wanted cheese, or mayo on that...think about it...think about your grandma.
-ac

11.04.2010

Butternut Squash and Potato Gratin -Anti Chef


Alright, here's one that all of you can make, but some of you may think you can't, but you really can. There are just a few ingredients, easy, no frills cooking instructions, and it is a wonderful side dish that goes well with most anything.I came up with this by bastardizing a recipe for a potato gratin that I have used for years. It is a great recipe, but I found myself one day without enough potatoes to make a gratin, cakes, mashers or anything, so I got creative. I was actually fairly amazed at how well it turned out. I would put it on any fall menu were I still game-fully employed in the regular restaurant industry. I hope you will try it out, and I hope you like it.

ingredients:

- one small to medium butternut squash, peeled
- enough small to medium sized potatoes to make the squash weigh two pounds (about two), peeled and sliced 1/4 inch thick
- one quarter sweet onion, thinly sliced
- 1.5 c. heavy cream ( do not be scared here)
- 3/4 c. grated Parmesan cheese ( you can use the expensive stuff if you want, but you don't have to, and most folks have this on hand already)
- salt and pepper to taste
- sprinkling of dried thyme, about a teaspoon

method :

- first of all, I must try and demystify the butternut squash. Sure, you see them in the store and think, "hmm I bet that would be good, but I dunno....looks like a lot of work..." Stop right there. It is easy as pie to break one down if you follow a simple procedure. Use a normal vegetable peeler to peel it, although you may have to be a little more aggressive in your peeling stroke, it will peel just like a carrot. Make sure when you peel it that you get all traces of green rind looking stuff off, down to the flesh. Once you have it peeled, lop off both ends with a sturdy knife. If big knives scare you, place a kitchen towel between your hand and the blade of the knife as you apply even pressure over the whole of the knife, one hand on the handle, the other over the back of the blade. At this point I like to break it down further in two steps, the "neck" and the "bulb". The neck is easy, just slice it down the center along it's length, and then slice those halves into 1/8 to 1/4 inch pieces. The bulb requires a little more cleaning, but not that bad. Just slice it in half and use a spoon to scoop out all the seeds*. Then break it down so that you have slices similar to those of the neck. Easy squash butchery, there ya go! Now you are ready.

- since the recipe calls for 2 pounds of vegetable matter, you will need to use a scale, but not really though, although it is great to have a digital scale around the house for baking etc. If you can't find one at your local kitchen supplier, or you don't want to visit your local "head shop" then go on line. There are many different types of scales, you just want to make sure you get one that will allow you to use various forms of measure (metric/standard...) and that will handle poundage. I like to start by placing a large, light weight bowl on my scale and "taring" it, or "zeroing" it out.

- as you begin to cut up your veggies, add them to the bowl, that way you can keep an eye on the weight, start with the potatoes first, then the squash and again, if you really go over, just use a little more cream and a bigger casserole dish.
- once all of your veggies are in the bowl, potatoes, squash and sweet onions, add all the other stuff and mix well. use the same bowl you measured in, less mess.
- transfer the ingredients to a lubricated 9"X9" casserole dish and use your hands, or a spatula to press it evenly into the dish. if the stuff looks a little dry, no matter, the squash will release a bit of moisture during the cooking process and provide all the liquid the dish needs. if you have gone over with the veggies and they don't fit, move up to 9"X13" and increase the cream in the recipe by one half cup, for a total of 2 cups...the cheese, that's your call.
- cover the dish and bale @ 350 degrees for about 45 minutes, carefully remove from the oven using potholders and remove the covering. place the casserole back in the oven for an additional 20 minutes, or until she starts looking too browned.
- allow the dish to rest 10 to 15 minutes to set, then enjoy. this will provide a nice side dish for at least 6 to 8 people ( with the small casserole)

* cook's notes.
1) yes, if you so desire to go through the laborious task of sorting seeds from pulp, they are very much roast-able like pumpkin seeds, good garnish material, or additions to morning cereals, hot or cold.
2) you may choose to dress this one up by using fresh thyme in the dish, and fresh parsley or chives as a garnish, and I absolutely LOVE the use of fresh herbs as well as other ingredients whenever possible, however, the theme of this show is to make the most out of what you have, most folks have dried thyme in their spice rack, and if you don't, and you like my recipes. do yourself a favor and get some SOON. It is a big favorite of mine and shows up frequently.
3) This recipe suggestion, like most of mine, is but a template...a place from which to start exploring. I use Yukon Gold potatoes because I love them, but you can use any potato you want, sweet potatoes even. I have heard that the more orange the food, the better it is for you, but I AM NOT A DOCTOR, NOR A NUTRITIONIST AND YOU SHOULD RESEARCH NUTRITION FACTS ON YOUR OWN, maybe we can eventually set up a ling to a website for that type of info??? But my point is, play around a bit, mix and match flavors and ingredients, I bet a little curry powder would go a long way in here. In any case, get familiar with easy to make recipes like this one so that you can throw together good, home cooked foods for your soul and your family.

11.03.2010

Quick Tarts -killertomato

This old recipe still does tricks. These savory quickies can be baked large or small, for a surprising addition to lunch or dinner, cold snack from the fridge or little party bites. The filling is versatile as long as you have egg and milk to make the custard. I love it because you can throw in extra cheese you have on hand, vegetables you need to use or whatever you wish- try walnuts and blue cheese- yet they look and taste like something special. At my house, they add some protein when paired with vegetable soup or work perfectly when going to a potluck. Plus, the dough freezes well. I may make a large batch before the holidays to pull out at random.
*
Pastry:
1/2 tsp salt
1 c. sifted flour
2/3 c. butter, shortening or lard
6 oz cream cheese
*
Sift salt and flour. Blend in fat and cream cheese with pastry cutter or quickly in a stand mixer with paddle attachment. On a floured board, roll out, fold, roll out again. Repeat. Press pieces into muffin tins or tartlet forms. Your fat and cheese must be cold as when making pie crust.
*
Filling:
1 egg
1 c. milk or half and half
pinch of salt
3 green onions
handful grated cheese (most any will do)
*
Line small or large tins with dough. Beat egg slightly, add remaining ingredients, pour into cups. For mini tarts, bake at 350 for 10-15 minutes, when filling quivers only slightly. For larger sizes, bake at 300 degrees for about 30 minutes. YUM. These never last long.

11.01.2010

Colder Days Are For Stewing -killertomato

There's a phrase in Italian about hens, "La gallina fa buon brodo", meaning "The old hen makes good stock." B brought home a hen recently after discovering it at the Sweet Auburn Curb Market in Atlanta. You can buy many different cuts of meat there that aren't offered at conventional grocery stores, such as pigs' feet, offal and whole birds with their necks and all. We usually choose to buy a whole bird and butcher it at home. You get a lot more for your money and can pull meat out of the freezer for a while afterward. All you need is a very sharp knife. A tough old bird like a hen goes for a very fair price, since you pretty much have to stew it if you want to be able to chew and swallow the poor dear. You'll know it's an older one if it is large (around 10 lbs or so), should say "stewing hen" somewhere but don't count on that, and is more difficult to butcher. By the way, places like the market we bought this one from may butcher it for you if you ask.
 *
I'm sure there are other sayings about how the bird may be old but it isn't finished yet, because roosters and hens alike make a lovely and decadent stock. Coq Au Vin is probably the most popuar dish to make at home using rooster or hen, but at the time, we had all caught a cold, the baby was cranky and I needed to make my baby some chicken soup. B made a simple stock after butchering by covering the carcass in a large pot and covering it with water. For the next two hours, he skimmed the "clouds" off the top of the water as it simmered. Then added a mirepoix (though he would never call it that as he is presently being tutored in a strictly Italian methodology) along with peppercorns and simmered for one more hour.
 *
Any piece of the hen can be used next, I used the breasts and wings. They were coated in flour and seared in olive oil until browned. I think butter would be a good option here, but whenever we are cooking with the baby in mind, we have to be mindful of fats, sugar, and sodium. Then, in a dutch oven, sauteed more carrots, onions, and celery- since we had those particular vegetables- salt and peppered them, and added the chicken. Then about half the stock, plus about five or six sliced okra which were coming in strong out in the front yard, dropped in a bay leaf and baked at 250 degrees for about 3-3 1/2 hours. This is a lot like making short ribs. The meat should fall off the bone when it's done. You could never put an older bird like this in the oven and roast it without the liquid to braise it. The inside of the meat might get tender enough, but there is an outside layer that people have probably attempted to make boots out of.
*
I feel so bad that I don't have pictures to accompany this procedure. For one thing, it happened before this blog was even a thought in my head. I do have a link to a diagram on butchering a chicken, though: http://recipehut.homestead.com/chicken_photo.html.